
The Five Winter Photography Tricks That Make Snow and Outdoor Lights Look Beautiful (Part 2 of 2)
Plus: Why your phone battery dies in the cold, apps for editing winter photos, and the complete photo organization guide coming soon


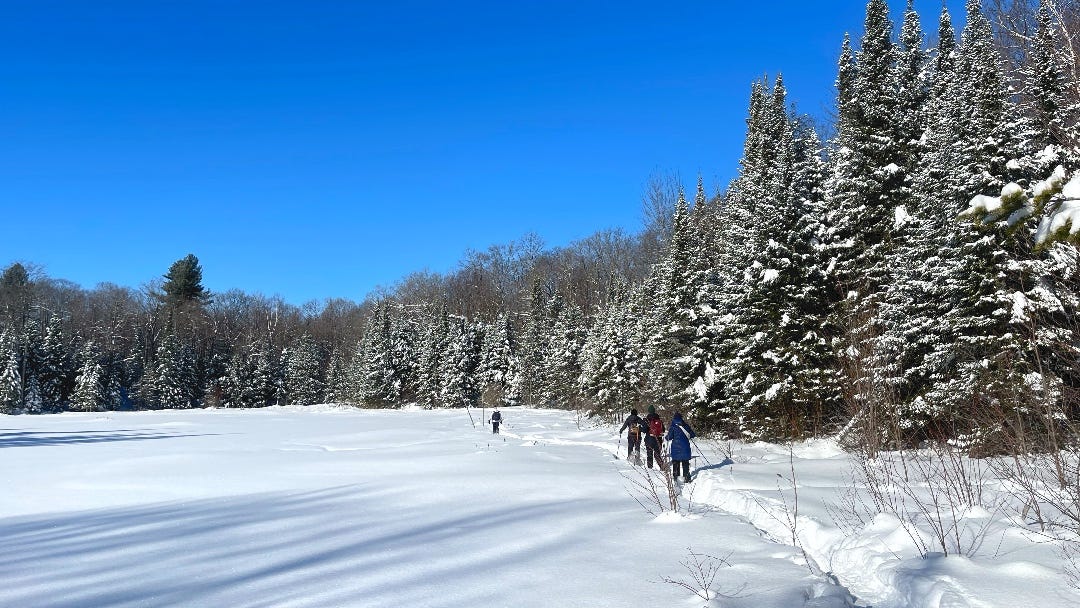
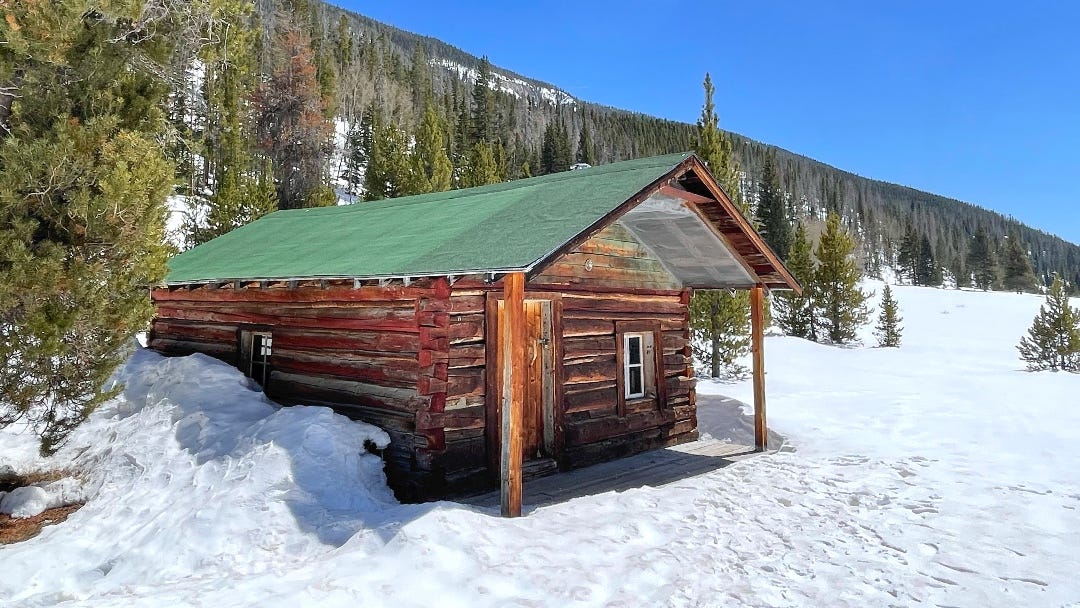
Christmas Day and Boxing Day bring winter walks on beaches, through snowy landscapes, and past houses decorated with lights. You want to capture the beauty of fresh snow, the sparkle of outdoor decorations, and family members enjoying the winter air. Instead, your photos make white snow look gray, your phone battery dies unexpectedly, and bright holiday lights appear as washed-out blobs.
Your smartphone can capture stunning outdoor winter photos, but cold weather and bright white snow pose challenges that indoor photography does not. These five techniques address the specific problems of winter photography and work on any phone in any cold climate.
This is Part 2 of our two-part holiday photography series. Monday’s newsletter covered indoor photography for Christmas dinners and candlelit gatherings. Today covers outdoor winter photography for walks, snow scenes, and holiday lights. If you missed the first one, here it is:
The Five Phone-Camera Tips That Save Your Indoor Christmas Photos (Part 1 of 2)

Christmas dinners start this week. You want to capture the warm glow of candlelight, the decorated table, and everyone gathered together. Instead, your photos come out dark, blurry, or washed out with harsh flash. The food looks unappetizing, faces are shadowy, and the cozy atmosphere you saw with your eyes completely disappears in the photos.
Today you’ll learn:
Why snow always looks gray in photos (and the one slider that fixes it instantly)
How to keep your phone battery working in freezing temperatures
The focusing trick that makes snowy landscapes look crisp and clear
Why photographing holiday lights requires different settings than daytime shots
How to photograph people in snow without making them squint
Two apps that help edit winter photos to look natural and vibrant
A quick tip for cleaning condensation off your lens without damaging it
For new readers: Screen Skills provides practical digital advice that everyone can understand and apply within minutes. Discover hundreds of simple tricks that make your digital life more efficient and enjoyable.
Today, you can get a 20% discount on the first year of your subscription.
If this newsletter provides useful information that reduces your screen frustration, improves your output, and makes spending time online more fun for you, please consider supporting this newsletter that occupies a unique niche on Substack: digital tips for non-digital people. 🎄
Why outdoor winter photos look wrong
Snow and bright winter skies confuse your phone’s camera meter. The camera sees a scene dominated by white and assumes it should darken the image to prevent overexposure. This automatic adjustment turns pristine white snow into dull gray mush. The opposite problem occurs with holiday lights at night, where the camera tries to brighten the dark sky, washing out the colorful lights.
Cold temperatures present a separate challenge. Phone batteries drain dramatically faster in freezing weather, often dying at 20 or 30 percent charge. The phone’s screen may also respond more slowly, and condensation can form on the lens when you bring a cold phone into a warm house.
Understanding these specific winter challenges allows you to work with your phone’s capabilities rather than fighting against automatic settings that were designed for average conditions. These five techniques address winter photography problems directly.
The five essential techniques for outdoor winter photos
Note: Different phones have different features. I will explain each platform clearly so you can use what works for your device.
Most readers probably already know that winter presents photography challenges, but your phone includes specific tools to handle bright snow and cold weather conditions.
1. Brighten snow scenes manually to make white snow look white
This is the most important winter photography technique. Your phone’s camera sees bright snow and automatically darkens the image to prevent overexposure. This makes snow look gray or dingy rather than bright white. You must manually override this automatic darkening.
For iPhone users, frame your snowy scene, then tap the snow or sky. The yellow focus square appears. Immediately drag the sun icon slider upward to brighten the image. Keep dragging until the snow looks white on your screen rather than gray. This will make the image brighter than the camera’s automatic setting, but this is correct for snow photography. The snow should look bright white, not medium gray.
For Android users, tap to focus on the snow, then swipe upward on the screen to increase brightness. Many Android cameras show a +/- indicator or a brightness slider. Increase the brightness by approximately one or two steps above what the camera suggests automatically. Check the screen preview to ensure snow looks white rather than gray.
Professional photographers call this exposure compensation, and they typically increase exposure by about one full stop when photographing snow. Your phone’s brightness slider accomplishes the same result. Without this manual adjustment, snow photographs always disappoint because they look dingy and gray.
2. Protect your phone battery from cold weather
Cold temperatures cause phone batteries to drain much faster than normal. A battery that shows 50 percent charge indoors might suddenly drop to 10 percent or die completely when exposed to freezing temperatures for even a few minutes. This happens because lithium batteries become less efficient in cold weather.
The solution is to keep your phone warm between shots. Store your phone in an inside jacket pocket close to your body rather than in an outer pocket or bag. Your body heat keeps the battery warmer and maintains better performance. Only take the phone out when you are ready to take a photo, then return it to the warm pocket immediately afterward.
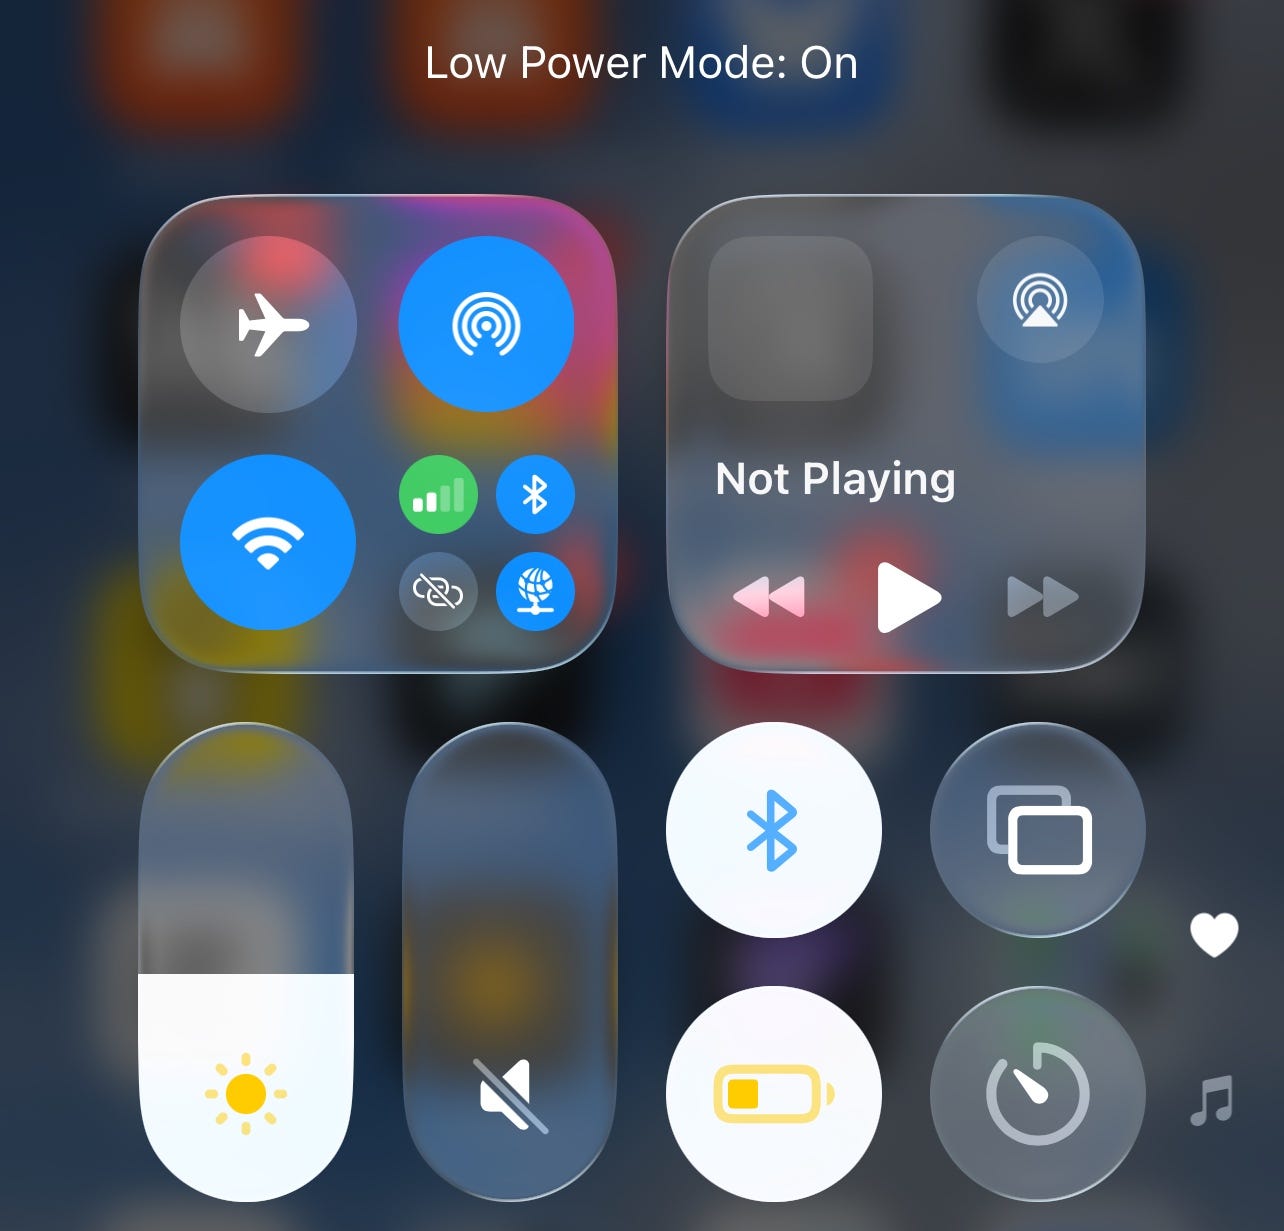
If you plan to take many photos during a long winter walk, consider these additional steps. Turn on Low Power Mode before leaving the house, which reduces background activity and extends battery life. In Settings on iPhone, tap Battery and enable Low Power Mode. On Android, go to Settings, Battery, and enable Battery Saver or Power Saving Mode.
Bring a portable battery charger if you expect to take photos for more than an hour in very cold weather. Keep the charger warm in an inside pocket as well. Some people also carry a spare phone in a warm pocket as a backup camera if the primary phone’s battery fails.
When you finish taking winter photos and return indoors, let your phone warm up gradually. Sudden temperature changes can cause condensation inside the phone, which can damage components. Leave the phone in your jacket pocket for ten or fifteen minutes after coming indoors, allowing it to warm up slowly before using it normally.
3. Focus on midtones rather than bright snow or dark objects
Focusing becomes more difficult in snowy landscapes because the scene lacks contrast. Your phone’s autofocus system works by detecting edges and differences between light and dark areas. A landscape covered in uniform white snow provides few clear edges for the camera to grab onto.
Instead of letting the camera focus automatically on the snow itself, tap to focus on something with more detail. If photographing people in snow, tap on their face or jacket. If photographing a snowy landscape without people, look for a tree trunk, a fence post, a rock, or any object that is darker than the snow. Tap on that object to focus, then reframe your shot if necessary while keeping the shutter button pressed halfway to lock focus.
This technique ensures sharp focus even in challenging conditions. The camera can identify clear edges on the darker object, which helps it focus the entire scene properly. After focusing on a midtone object, the snow will also appear sharp because the focus plane extends both in front of and behind the focus point.
For iPhone users who want even more control, you can lock focus and exposure together. Tap and hold on your focus point until you see “AE/AF Lock” appear at the top of the screen. This keeps both focus and exposure locked even if you move the camera to reframe. This works particularly well when taking multiple photos of the same snowy scene from different angles.
4. Position people with side lighting to avoid squinting and shadows
Bright snow creates intense reflected light that makes people squint and creates harsh shadows on faces. The worst position is facing directly toward the sun with snow all around, which causes squinting and often creates an unflattering, washed-out look.
Instead, position people so the sun lights them from the side or from slightly behind them. This is called side lighting or backlighting, and it creates a more flattering look with fewer harsh shadows. The person can open their eyes normally without squinting, and the light creates a pleasant glow around them.
If you photograph someone with backlighting, remember to use the tap-to-focus and brightness adjustment technique from Part 1. Tap on the person’s face and drag the brightness slider up to properly expose their face. The snow behind them will become very bright or even white, but this creates an attractive, high-key look that works well for winter portraits.
For group photos in snow, try to position people in a shaded area or wait for clouds to diffuse the harsh sunlight. The even light from an overcast sky eliminates squinting and creates more flattering portraits than bright direct sunlight reflecting off snow.

Portrait Mode works particularly well in snowy landscapes because it blurs the busy white background and keeps faces sharp. This creates separation between the person and the background, making the photo feel less chaotic. Use Portrait Mode when people are standing three to eight feet away from the camera for the best effect.
Today, you can get a 20% discount on the first year of your subscription. 🎄
If this newsletter provides useful information that reduces your screen frustration, improves your output, and makes spending time online more fun for you, please consider supporting this newsletter that occupies a unique niche on Substack: digital tips for non-digital people.
5. Photograph outdoor lights at dusk rather than full darkness
Holiday lights and outdoor decorations photograph best during what photographers call blue hour, which is the period just after sunset when the sky still has some color but lights are turned on. This typically lasts about thirty minutes and provides the perfect balance between ambient light and artificial lights.
If you photograph outdoor lights in complete darkness, the camera exposes for the bright lights and turns everything else black. You lose all context and detail around the lights. If you photograph too early while the sky is still bright, the lights look dim and unimpressive. The sweet spot is that thirty-minute window after sunset when both lights and surroundings are visible.
For iPhone users photographing holiday lights, turn off Night Mode for this specific situation. Night Mode tries to brighten the dark areas, which can make lights look washed out and less colorful. Tap the yellow moon icon and set it to Off. Use the standard photo mode and let the camera expose for the lights naturally.
For Android users, switch to regular Photo mode rather than Night Sight when photographing decorative lights. Night Sight brightens everything, which reduces the impact of the lights themselves. You want the lights to glow brightly against a darker background, not blend into an artificially brightened scene.
If you want to capture light trails from moving cars or create star effects around bright points of light, search your phone for a long exposure mode. Some phones include this as a feature within Night Mode, while others require a third-party app. Long exposures of two to four seconds create lovely light trails and star bursts around holiday lights.
One practical tip: When photographing winter beach walks or dunes, as I do on the Dutch island where I am this Christmas, remember that wet sand and water can also confuse your camera’s meter, just like snow. Use the same exposure compensation technique, brightening the image manually to prevent the beach from looking gray and dull.
Worth knowing
Snow photography has challenged photographers since the invention of the camera. Early photographers using film had to manually adjust exposure settings or risk underexposed images with gray snow. Modern phone cameras inherited this same limitation because the camera’s light meter measures reflected light and cannot distinguish between a white surface that should be bright and a dark surface in bright light.
The blue hour period for photographing lights gets its name from the deep blue color of the sky during twilight. This happens because the sun is below the horizon but its light still scatters in the upper atmosphere, creating rich blue tones. This blue provides a beautiful contrast to the warm colors of holiday lights.
Lithium-ion batteries, which power all smartphones, experience increased internal resistance at cold temperatures. This reduces the voltage they can deliver, which the phone interprets as a lower charge. The battery has not actually lost capacity permanently. Once warmed up again, the battery returns to its normal performance and charge level.
Condensation on your lens happens when you move a cold phone into a warm, humid environment. The cold glass causes water vapor in the warm air to condense immediately on the lens surface. This is why you should let your phone warm up gradually rather than bringing a frozen phone directly into a warm, steamy kitchen after a winter walk.
Tech news you can use
Apple and Google improve cold-weather battery management
Both Apple and Google released updates this month that improve how phones manage battery performance in cold weather. The updates adjust how the phone reports remaining charge when cold and provide more accurate battery estimates. If you have an iPhone or Android phone, check for the latest software updates in your Settings before your next winter outing. These updates do not prevent battery drain in cold weather, but they provide more accurate warnings before the battery dies.
Instagram adds winter holiday frames and stickers
Instagram updated its Stories features this week with winter-themed frames, stickers, and filters specifically designed for holiday content. These include snow effects, holiday light overlays, and seasonal text styles. If you use Instagram Stories to share Christmas photos with family, look for the seasonal stickers when editing your story. The winter effects work particularly well with photos of outdoor lights and snowy scenes.
Google Photos enhances winter photo editing
Google Photos improved its automatic enhancement algorithms for winter scenes this month. The app now recognizes snowy landscapes and adjusts brightness and color balance accordingly when you use the Auto button. This update helps correct the gray snow problem automatically when editing existing photos. If you have Google Photos, try the Auto enhancement on winter photos taken before learning the manual brightness technique. The app may salvage photos that initially came out too dark.
App spotlight: Snapseed (iPhone and Android)
Snapseed, made by Google, is a free photo editing app that works exceptionally well for winter photos. The app includes precise tools for adjusting brightness, contrast, and color that help fix common winter photography problems even after you take the photo.
The Selective tool is particularly useful for winter scenes. It allows you to brighten faces without brightening the entire photo, or adjust the snow brightness separately from the sky. Tap the plus icon, place a point on the area you want to adjust, then use sliders to brighten, increase contrast, or adjust color temperature for just that area. This granular control helps rescue photos where faces appear too dark against bright snow.

Download Snapseed from the App Store or Google Play Store. The app is completely free with no advertisements or in-app purchases. After opening a photo, tap Tools to see all available adjustments. Start with the Tune Image tool to adjust overall brightness and contrast, then use Selective adjustments for fine-tuning specific areas. Your edits save as a copy, leaving the original photo unchanged.
App spotlight: VSCO (iPhone and Android)
VSCO provides film-inspired filters that work particularly well with winter scenes. The app’s winter-appropriate filters add warmth to cold landscapes, enhance the blue tones of snow shadows, and create moody atmospheres that suit the season.
Beyond filters, VSCO includes manual editing tools for exposure, temperature, and tint that give you precise control over winter photo colors. The app also includes a built-in camera with manual controls similar to the apps mentioned in Part 1, though its real strength lies in editing rather than capture.
Download VSCO from the App Store or Google Play Store. The basic version is free and includes essential editing tools and some filters. The paid membership unlocks additional filters and advanced editing features, but the free version provides everything needed for improving winter photos. After importing a photo, swipe through the filter presets to find ones labeled with winter or cold-weather themes.
Quick fix: Cleaning condensation from your lens safely
When you bring your cold phone into a warm house, condensation often forms on the camera lens, making photos look foggy and blurred. Do not immediately wipe the lens with your shirt or a tissue, as this can smear the moisture and make things worse.
Instead, let the phone sit and warm up naturally for five to ten minutes. The condensation will evaporate on its own as the phone reaches room temperature. If you need to take a photo before the condensation clears naturally, breathe gently on the lens (as you would to fog glasses), then immediately wipe with a clean, dry microfiber cloth in a circular motion. The warmth from your breath helps evaporate the condensation, and the immediate wipe removes it before it reforms.
Never use paper towels or rough fabrics on your phone’s camera lens, as these can scratch the lens coating over time. A microfiber cloth, eyeglass cleaning cloth, or even a clean cotton t-shirt works better for removing moisture without scratching.
Meanwhile: The complete photo organization guide is coming
Several readers replied asking for the complete photo organization guide mentioned in Monday’s newsletter. I will publish this comprehensive guide soon, likely between Christmas and New Year, covering how to organize the hundreds of photos you will accumulate during the holidays.
The guide will address creating albums, using search features effectively, managing duplicate photos, backing up photos safely, and the best practices for long-term photo organization. I will include updated information from my previous photo newsletters, plus new techniques for managing large photo libraries after holidays and vacations.
If you have specific photo organization challenges or questions, reply to this email, and I will address them in that guide. Common questions include: how to organize photos from multiple family members’ phones, the best way to share photos with relatives who use different phone types, and whether cloud storage is reliable for long-term photo preservation.
Did you read this one?
How to Stop Companies From Building Detailed Profiles of Your Life Using Your Phone

Your phone collects more information about you than most people realize. Every app you use, website you visit, and search you perform generates data that companies use to build detailed profiles of your habits, interests, and behavior. But your phone also includes powerful privacy controls that can significantly reduce this tracking without breaking any…
Questions?
What winter photography challenges frustrate you most? Have you experienced phone battery problems in cold weather, or struggled to make snow look white in photos? Reply and let me know what outdoor photography problems you encounter during winter.
Until next time,
Alexander
Today, you can get a 20% discount on the first year of your subscription. 🎄
If this newsletter provides useful information that reduces your screen frustration, improves your output, and makes spending time online more fun for you, please consider supporting this newsletter that occupies a unique niche on Substack: digital tips for non-digital people.

I also publish on Patreon:
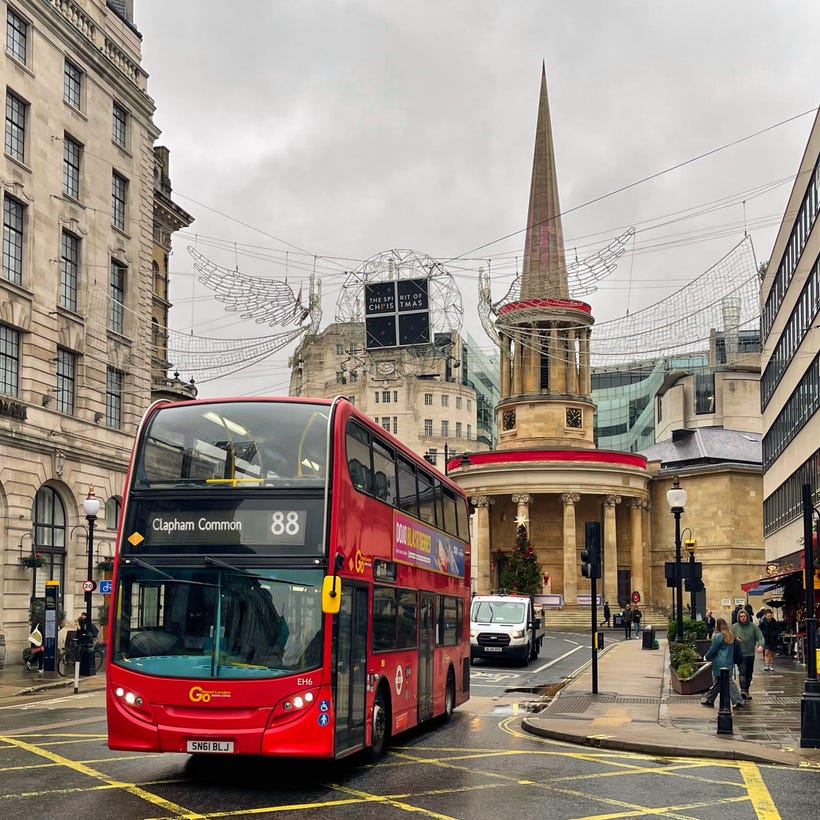
My stories on Patreon are more personal and informal. For instance, on Saturday, I wrote: Checking if London was Still There.
It is Christmas; join Patreon: 🎄
Or perhaps you enjoyed the article and would like to support my writing by buying me a coffee?
Still here?
Then have a look at my other two newsletters:
The Planet: a weekly newsletter examining American democracy, freedom of speech, and environmental policy through a European perspective. Having lived, worked, and traveled extensively in the US and beyond as a backpacker, diplomat, and journalist, I explore current events through historical context, showing how lessons from the past inform today’s challenges to democratic values and planetary health.
On Monday, I published:

Daybreak Notes and Beans: a daily newsletter with a focus on positive news to counterbalance the negative headlines you see all day. Five days a week, I share ten uplifting news stories about science, health, art, travel, archaeology, or any other topic I think you’ll enjoy reading or that will give you hope now that we need it.
Have a look by clicking here:
Yesterday, I wrote:

"If you plan to take many photos during a long winter walk, consider these additional steps."
I also bring a charging block and cable and head to the nearest warm café ☕
Checking out Snapseed because of your demo :)
Looking forward to the photo organization guide
Thanks! 📱💻
Haven't had a chance to read this properly, but the cold was strong this morning up on a mountain.
I remembered seeing that you wrote about it here. I have a small "thermo pac" (I think that's the brand name) for my phone. I got it in Lillehammer in 2019. Works a treat!
Today my fingers were more of a problem though. You kind of need those to take pictures. And touch screens don't allow gloves. My finger tips were frozen solid. Any thoughts on how to fix that?